Redditch Bonsai Society is a small, friendly society whose aim is to practice the ancient art of bonsai with like-minded people. Our varied annual programme includes talks, demonstrations and workshops. The more experienced members are always willing to give advice and encouragement to newcomers and we have a small collection of books and magazines.
December 2023 Joint Newsletter
Editor's Remarks
We are thinking of getting rid of a lot of “stuff” from our computer, particularly old newsletters and other circular material. Does anyone have any objection to this? If so, or if you would like a particular item kept safe here, do let us know. A lot of material will be archived by Alex however. It will then be available on the web.
As you will see we have included Teanah’s very extensive notes of Malcolm Hughes’s talk to the MBS in October. We are sure that you will all appreciate the trouble Teanah goes to in order to create these notes. Well done indeed!
It’s not too late to put your name forward to stand as a committee member.
Coming up at the MBS
The December meeting features the AGM and a Quiz/Social. The 2024 programme is not yet complete, but is “on the way”.
Coming up at Redditch
Members are reminded that there is no meeting at the Village Hall in December. The Christmas lunch will be held on Saturday 9th December 2023 at 12.00 for 12.30, the venue being The Green Dragon at Sambourne. If you intend coming and haven’t already sent in your menu choices please do so as soon as possible. The 2024 programme is not yet complete.
Gardening Tip of the month
Collect leaves for leaf mould. Lift and store dahlias. If the wet weather is going to continue I would be reluctant to leave dahlias in the ground over winter – even if they are mulched. When chrysanthemums are over cut back to about 6 inches and lift and box the stools in the greenhouse to produce cuttings for next year. Does anyone have any swops? This year I am not buying any extra plants from Woolmans but going back to Halls of Heddon in Northumberland. They have a very comprehensive catalogue and also produce some useful growing guides. Worth a look.
Bonsai tip of the month.
All my trees are now either under cover from the rain or in the greenhouse – that is except for a couple of big pines and a large group of beech which will stay out – although I have covered their soil surface to keep the worst of the rain off. They have all been treated for leatherjacket and vine weevil. Winter tar oil wash can be considered although protect any moss. In fact this will be the subject of a talk next year.
Teanah’s Notes of Malcolm Hughes’s Presentation of October 2023.
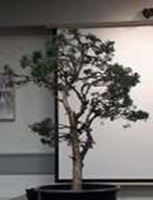
This Chinese juniper (juniperus chinensis) was part of a group with an interesting history. The tree was planted as part of a nine tree group started back (we think 1958-60) so you can do the maths as to how old this particular specimen is. It was competing in terms of its root supply and acquisition of nutrients with eight other trees so you’ll probably find it’s been a little bit stunted as a consequence. We've dismantled the group because two or three of the smaller ones died and we decided to work on the others as separate entities, and then see where we go with them from there.

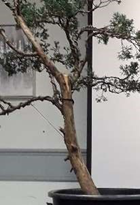
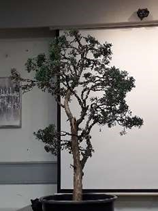
This has only been out of that group setting for some 13-14 months. We hope, in the next two or three months, to get it out of that pot into it bigger training pots or possibly even its definitive bonsai pot.
There’s one or two very straight bits in it. Something that the French Bonsai Master, Francois Jeker always says is ‘look at the tree and let the tree tell you what it thinks it ought to be as a bonsai’.
One of the things I’m unhappy about is the fact that you’ve got a continuous straight section in the centre. So first and foremost, someone will say, ‘Well that could be jinned!’. No! The tree by its very appearance is too slender. Also, just because there’s a dead Section to it, does not make it obligatory to jin it.
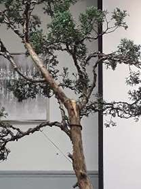
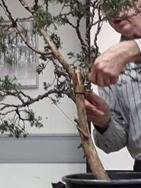
Developing the Tree
Is there anything superfluous that we can get rid of? Anything weak that is not going to do much.
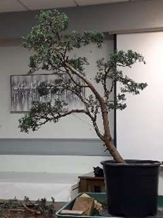

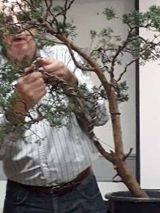
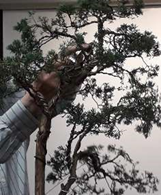
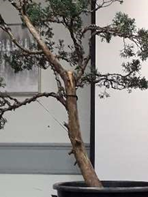
We’ve now got a gentle curve and then a more pronounced curve. That’s the first point, secondly, if we’re going to keep it like that, the question then is, ‘Where are we going to have the apex?’. One possibility is work with it as it is - you've got a good range of material up here to use as the foliage pads but you've also got this material here near the top. I think this is going to be one of those instances where we start lower down and work upwards.
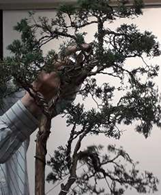
The other thing that’s going to be a deciding factor is there is a root protruding. When the tree was part of the group, it was buried, you couldn’t see it. Now because it’s tilted over, its emerged, and actually I think it could possibly be a character to go with the tree when it is in its definitive pot.

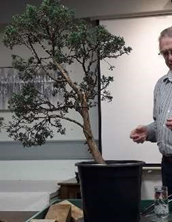
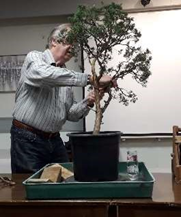
We're looking at this as the likely preferred viewing site which means, as far as the back of the tree is concerned, we want to have that impression of depth. If we want to, we can then start to bring things around and into place with wiring.
Wiring
Some of the branches are delicate and by that I mean that if you try and put too much pressure on them, bending them, you’re going to have something go snap.
I’m using a guy wire and by means of using some of the wire we've put on here, I’ll bring bend this branch around by actually taking it into a different angle. This will bring it to set in position in due course, but this is going to be a slow-ish process. So, what we’re going to do here is, just for the time being, use this guy wire to pull it into a new position and here's where we can use a former dead branch as a means of keeping it supported.
We’ve got that bit roughly in position now back here, it is going to be a case of compacting these branches. Do a sort of ‘snake’ by twisting and contorting to bring the pads closer together. When it comes to working with a tree, remember you don't just have to bend a branch up, down or sideways to get the positions you want, you can turn it on its own axis.

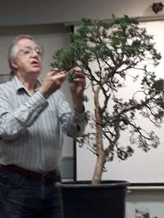
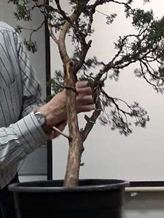


I’m thinking of giving the tree a different level - insert some height. We can start to bring things to a point where we're getting an impression of depth and this is where you have a sort of two tier arrangement of foliage. This is going to give us our back perspective.
The predominant movement of the tree is in the direction of the curve, but I always feel it pays to have a counterbalance. Positioning the pads is going to determine how the apex works out. It's all a matter of levels and you want the different tiers but you don't want one bit obscuring another if it's at all possible. It will need a bit of fine wiring and a bit more refinement but basically that is where we're at. We have level 1,2,3,4,5,6 and the apex.
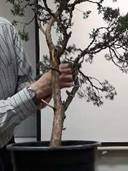
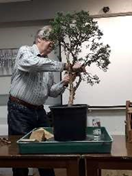
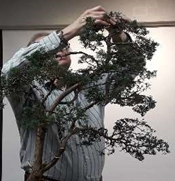
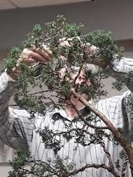
- There are still one or two bits that need to be thinned out. We’ve got a point where three branches emanate from the same spot. Now, if I was to leave those there, there’s going to be a vigorous growth bulge that will become unsightly.
- In terms of our overall style, we have our layers in place. There will be some fine wiring to be done. The thinning out process will become more apparent as we go into the next season because of the fresh growth that should emerge with the spring.
- What evolves in the next couple of years will dictate whether or not that is how it’s going to be in the long term.
- Deadwood - Perhaps bring that down by just carving out a slight hollow into it. When that happens, you get the callousing which will start to help to thicken up that part of the tree.
- Cutting some of the smaller branches out because of the density of the foliage pad itself, prevents a big balloon, or pads like a pompom. It just means a bit of trimming every two three months during the growing season from April through to September - that should keep it under control.

Feeding
When it comes to your feeding regimes, you have three fundamental elements: sodium potassium and potash. The sodium is what gives bigger foliage; administered in the spring. The potash is what’s going to give hardiness at the end of the season and see everything through to the following year - roots etc.; and your potassium is going to be helping you with foliage hardiness and flowering.
At this time (early autumn) if you use a regular well-balanced feed such as Chempak #3, you should be tailing that off now. What you’re going to be looking at in the next few weeks is your high potash, very low nitrogen, something like Chempak #4 which has no nitrogen in it. It’s just the potassium in the potash or something else that offers you a low nitrogen level. That is something to consider as we’re in October now I would say certainly by around the end of the month into early November. That is when your ow nitrogen, high potash feed takes effect. After that just let it go through the winter. Wind protection is obviously something else that we consider now when it comes to your feed.
With Chempaks, from bonsai point of view, you only need to consider #2, #3,4# and #8. Rhat would cover everything from your high nitrogen #2, right through to your potash.
Then it’s a question of how to distribute the feed well. With potash (blood, fish and bone was the old way of describing it) it’s a case of, ‘What does it say on the bottle? On the can? because there is a purpose for the label. If it says ‘this is the dilution range you should be looking at’, then don’t be tempted to ‘play safe’ and put a bit extra in. That is where the tree’s tolerance level might start to go a little bit haywire. It’s easy to think yourself I’m doing the tree of favour. I’ll just give it that little bit of extra... The point is the root system in some trees can be more delicate, more sensitive, and therefore can adversely react to too high a concentration of a particular feed. This will apply, be it your high nitrogen in spring, your balanced feed in the summer or whatever. So start off with what it says on the bottle and make it slightly more dilute than what the instructions say. For example, if it says 1:10 ,do it as 1:10. Don't be afraid to make it safe with 1:12 when you water it onto the soil surface. If, on the other hand, you're going to do a foliar feed then that is where the instructions differ.
Foliar feed has a lot to recommend it is something that I do, particularly in the summer months. This is taking your solution of a nice balanced feed, something like Chempak #3 or #4, Phostrogen, Tomrite, liquid seaweed. See what the instructions are. If it says 1:10 for pouring onto the soil, as a foliar feed, double it – 1:20. If you're dealing with more delicate foliage there is a tolerance limit to which the tree can happily accept a foliar feed.
I would suggest if anyone is doing their foliar feed and it’s a hot bright sunny day, perhaps give the tree a misting first then do your foliar feed straight afterwards. That bit of extra moisture will help with the absorption of the nutrient rich spray and it does make a difference.
Remember: There are clear instructions! Adhere to them and, if you’re unsure, make it more dilute but don’t go the other way around and make it more concentrated!
When it does come to your feeding you know once every 10-14 days during the growing season is quite sufficient in most cases
Extra Pointers
Watering your Trees
If it’s really hot; I’m doing my first thing in the morning, last thing in the evening and I do a misting in the middle of the day.
Soil Mixture
A mixture of grit and pumice. You’ve got a very light mix, a very open mix and of course the roots have the chance to expand more than they would otherwise. Get a decent horticultural grit but if you get any of that grit first of all, wash it. When you do that put it in a sieve, get the sand out of it so you’ve got clean grit. 50:50 with your pumice.
At this time you need to be getting your winter residences for your trees in place so if you’ve got a greenhouse, polytunnel, whatever it is, one of the things you could afford to be doing now is fumigating. Buy one of those little things like a little volcano, put in, then seal it up tight and take cover. Let it fumigate and then it will be ready to put your trees in. If you haven’t got that sort of facility then, as long as they’re in somewhere sheltered in your garden close to a hedge or anything like that, that will be just as good. If there’s going to be severe frosts, then frost will not be so intense where you’re close to a wall, fence or hedge compared with in a more open area. The other thing is that if it snows heavily, don't worry! Snow is actually a very good insulation. The snow will eventually melt and the last thing you need to worry about is the watering. It’s going to be dripping. However, if it’s something like an acer or a very small tree with very delicate branches, get those tucked away somewhere safe. Even if it means bringing them into the house for the short term.
Another thing I always do is give the trees a tar wash. If you’ve got any jeyes fluid/ mixed patio cleaner, dilute appropriately and I say seriously diluted like 1:5 to 1:10 and then just spray it all over the tree. If it’s a pine, needles, everything, can have a blast of it but most importantly the trunk and the branches where anything you need to get rid of will be in those crevices.
Wes's Cherry
Classic format - as near a informal upright as you’re going to get when looking at it straight ahead. Good compact foliage. Firstly, if you're happy with the way it's looking in terms of the style then if it ain't broke don't mend it!
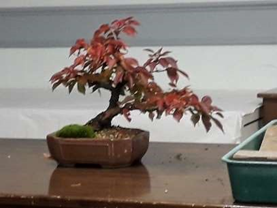


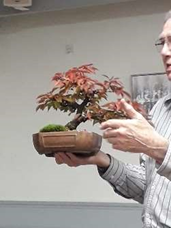
You can afford to wire a few things out and in doing so, I think you might find you got one or two bits of growth that could be superfluous. Where it’s rather busy, on the left hand side, you could find yourself having to do some serious thinning out.
There's one bit of growth where you’ve got four branches emanating from this one point, halfway along. You've also got a somewhat contorted branch which is not actually too long, and you've got a long extension you could actually remove the long bit. Let the other branches take over that would give you the depth.
If you're going to cut back on that side, the next thing you can afford to do is elevate the apex because that’s going to give you a more pronounced feature to the tree.
Richard & Jamie’s Pines
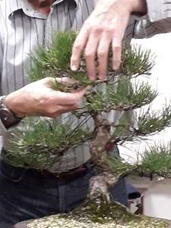
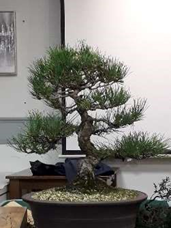
Japanese Black Pine (like Scots pines) very forgiving trees. You can really knock them and they come bouncing back. If you ever decide to go for a pine, I’d always say to someone starting, get yourself a Scots pine because that is one that you can play with. It’s flexible. It does things and it's a nice tree to learn on. Black pine are not dissimilar. The only difference is within this country black Pines need more protection in the winter. Scots pine can live outside for the duration. No problem with weather. Black pines do not like is their roots being too wet. In Japan the winters are cold and dry. Here they are cold and very wet.
In terms of what we’ve got here, nice movement of the tree. Works well with the pot it’s in. In this case we're looking at a well-balanced tree - branch structure’s good. Nice and open lower down but then we're getting a rather cramped apical area.
You've got good visual image of the trunk right up to that point. You've got to decide - it could be two or three small sections that you remove altogether. I would say the best thing would be to sit down, start opening them out. It might mean wiring most of them to see how they’re positioned and then when you’ve got the idea and which ones are still going in the wrong direction, thin out. You might not have to take them right the way back. It might only be part of the way to a back bud or something of that nature. Essentially this is just a case of opening up the apex and the need to have a more defined apex. It is a case of very selective pruning. You need to get more light and air in there.
When it comes to candles etc. developing during the late spring, early summer, it’s very much the same way as you do a Scots pine. If you want the branch to extend, you let the candle grow. On the other hand, if you want the branch to be about that same length but you want more buds further back towards the trunk then you cut back once the candle has grown, cut it back 2/3.

The other thing then of course is we're back to the feeding regime. Pines are going to differ slightly from everything else depending as to what you want the tree to do...
If we’re talking of a young tree then just give it its feed as you
would anything else - high nitrogen in the spring, balanced feed throughout the growing season. Your potash/ blood, fish and bone phosphate towards the end. When you've got a more mature tree, you might find that you would like more back budding.
Another thing people want to achieve with Pines is a reduction in the needle length so there are two factors that come into play here. One, if you want reduction in needle length, constrain the amount of water. Don't water it as frequently as you would other trees during the summer months. Perhaps during a warm period, whereas you’re watering everything maybe twice a day or just once a day with your pine, maybe once every other day. The more water it gets, the more likelihood will be the extension of the needles. Reduce the watering and needle length will reduce. Remember of course the life expectancy of a pine needle is 3 years so once that three years is up, the older needles turn yellow and drop away. New needles will have formed from the previous two years. If you've got the watering balance right, they will be shorter than the ones that dropped off earlier.
Back budding - here's where the feeding is important because if you do control the watering and then give a decent regular feed then you could start to see the back budding. It might not happen the year you actually cut back the candle, it might be the year following that. You can see it with fresh produce shortening so that in the end with a black pine needle, ultimately, in 4-5 years it could be half the length all over the tree.
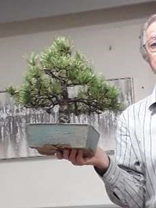

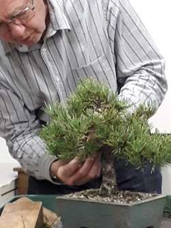
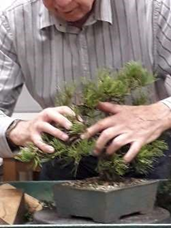
Nice little shohin! Some very good back branches which are giving you the depth of perspective.
The basic rule for the beginners is that you want to see as much of the trunk as possible so when you’re doing a tree, what you look towards is getting rid of is any branches coming straight towards you. People often prefer the predominant movement in one direction - going right to left rather than left to right.
More Gardening Tips
- Wrap up the Vulnerable:Tender plants like dahlias and fuchsias need extra warmth. Secure them with horticultural fleece or bubble wrap.
- Mulch, Mulch, Mulch:Spread a generous layer of mulch around your beds to insulate the soil and protect the roots.
- Potted Plants:Relocate sensitive potted plants to a sheltered spot or indoors to shield them from the icy winds.
- Cover and Conquer:Utilise cloches or garden fleece to shield delicate herbs and vegetables.
- Water Wisely:Ensure your plants are well-hydrated; moist soil retains heat better.
From the Chair
In the New Year, FoBBS is offering a new ‘New Talent Competition’ that is open to any bonsai society member or individual, providing they are not employed in full time employment as a bonsai professional. They may not be a previous winner of the FoBBS New Talent Contest. The winning prize is the opportunity to represent the UK at the next European NTC Final, a little south of Barcelona, Spain, for which the Federation will contribute to the costs of travel and accommodation. Full details and application form are available on the FoBBS website.
After racking my brains for something else to write about, I happened upon an item that might just appeal to some of you. Apparently, Lego have produced a Lego bonsai tree and the following is a report from Which? Magazine as a suggestion for a gift for a bonsai lover.

It's one of Lego's bestselling sets for adults and is designed to focus on building for mindfulness and decoration rather than strictly a set to play with. If your recipient loves puzzles or would like some guided DIY home décor, this is a great gift to consider. They can swap out regular green leaves for pink blossoms using 100 pink frog pieces. Watch out for: The majority of the pieces are really tiny and can get easily lost. We don't test Lego sets, but a few of our experts have this at home and like how the finished product looks on a shelf. While it retails for £45 direct from Lego, you can often find it on sale for under £35 from retailers like Smyth's Toys.
You can also compare prices below: LEGO 10281 Icons Bonsai Tree Set for Adults, Plants Home Décor Set with Flowers, DIY Projects, Relaxing Creative Activity Gift Idea for Women, Men, Her & Him, Botanical Collection Amazon Marketplace UK £36.90 John Lewis and Partners £44.99’ Obviously, not to everyone’s taste but who knows?
Judith
MBS COMMITTEE MEETING
We have held a committee meeting ahead of the AGM and here are some of the salient points from same:-
- The Treasurer will propose a small increase in subscriptions next year following a year in which we more or less “broke even”.
- The existing Committee/Officers will continue in 2024 if you approve. There have been 2 nominations for new committee members. The Treasurer, Wes, will NOT continue beyond 2024.
- The programme for next year is being formulated and will be somewhat different to this year. Details to follow shortly but one definite change is that the display table will NOT have a theme for any month. Consequently, you are thus encouraged to bring ANY TREE along. Do try and bring a tree to every meeting. After all we are a BONSAI SOCIETY and trees are what we are all about.
- As far as the rent of the room is concerned we are not told of any proposed increase at the moment. Members are reminded, however, that the club is making a bit of a concession to us by keeping the place open during the depths of winter when there is no cricket played. Members are therefore urged to buy at least one drink from the bar during club meetings. The worry is that if the cricket club may feel that it is just not worth paying the steward, Ben, to open up if there is little or no income.
- Income from the raffle is down. This income is important because it supports payment of the rent to the Cricket Club. Members are encouraged to buy more tickets and consider donating the odd prize now and again. Thanks.
- Christmas donations, instead of giving cards/posting cards this year will be made to the Midlands Air Ambulance.
In years gone by at the annual show members were able to sell trees to the public and this generated income for both the member and the club. This practice has died out but the committee wonders if there is any interest in resurrecting this practice. Let us know.
REDDITCH BONSAI COMMITTEE
We are pleased to inform you that David Haw has been co-opted to the committee until (and indeed probably beyond) the AGM. David will take responsibility for the website and other social media outlets in the hope of “spreading the word” and increasing membership. We thank him for stepping up to support the running of the society.